Friday, June 29, 2012

Adventures in Peanut Butter and Jelly - Take Two

So today I decided to try a new approach to breaking my girls of the habit of joyfully tossing peanut butter and jelly (or anything else for that matter) on my floor. 

What I did was as soon as one of my daughters started tossing anything on the floor I picked up the piece right away and told them, "no, that's not nice." Then if they did it again I said, "okay, thank you. All done?"

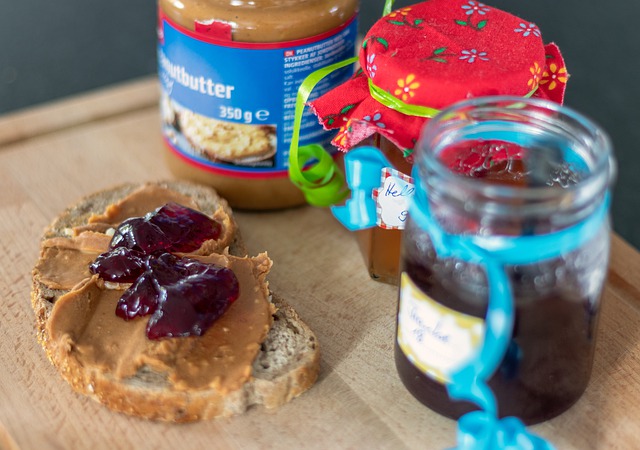
Then I took the plate away with what was left of the sandwich. If I didn't it would have ended up on the floor anyway... Isabella managed to hop over to my clean stove and wipe peanut butter and jelly hands all over my stove. I very quickly pushed her highchair away from the stove and began to clean her off. She then starts saying, "eye...mouth...nose."

She's pointing at the eye, nose and mouth while she sounds out the words with her little sing song voice. Then she says, "hair." I said, "no," and stopped her before she managed to smear peanut butter into her hair. Another habit I'd like to break them of... Over all though, the highchairs don't look too bad today and I only stepped in one piece of peanut butter and jelly. :P

Isabella is the neater eater. Gabriella takes after one of her big brothers and her mother. Yes, she is a natural born slob. I remember when I was younger and in school and even as I got older no matter how hard I tried to eat neatly I would always come home from school with ketchup on my shirt or something like that. 

She artistically paints her highchair tray, face and hair with whatever she is eating. Last night we had Raviolli's for dinner and she even managed to smear Raviolli sauce all over her leg. I wanted to cry, lol. 

My Relationship with the Sink and Dishes: It's Funny...

When I was younger I didn't have any chores. All I had to do was keep my room neat and clean up after myself when I took out my toys, etc. But even though I didn't have any chores I was just a really clean kid that liked to clean. 

I would just randomly help my mother clean the house. I would dust or mop. The one thing that I never did, however, was dishes. I was not allowed and honestly...I didn't want to.

My mother had her own way of doing her dishes just as I do now with mine. So because I never had to do dishes it was really hard for me to get used to them when I moved out on my own. In the beginning I rarely took my mother's advice with much, because I thought I knew it all and I was also very stubborn. She would tell me what she does with her dishes, offering her advice.

She would suggest that I rinse them as soon as I use them, and soak them, etc. Well I had to be stubborn and do things my way, the hard way. I didn't rinse right away, which meant more soaking time, which = wasting my own time. See Pet Peeve #2. Words can't begin to define how much I truly hate dishes. Because of our family size, it's a dream of mine to have a dishwasher one day in the near future. Hopefully by Christmas I'll have one. One can only dream a little dream...

I literally need one. The amount of dishes that I do in one day alone is unreal. I feel like I'm wasting my time and my day when I'm chained to the sink. That's how it feels...like I'm chained there... So it's ironic that I hated dishes so much for most of my life and now that's all I seem to do. Not only that, but since the birth of my girls I've been forced to stay on top of the dishes or else the kitchen would literally fall apart, lol. It really would, in point five seconds. This ship would sink...

So I went from being the type to soak them and then do them "later" or when I had the time, to rinsing and washing right away as much as I can. And if I can't wash them right away, then I at least make sure to soak them right away until I can wash them. I don't like my kitchen messy. A pet peeve of mine, which I should add to my list of pet peeves. :D

If your legs hurt try this . . .

Tonight I took the most relaxing oatmeal bath that I've ever had in my life. I don't usually make time for things like this, but my leg was hurting and I needed to soak it. I'm gonna "try" to make time to do this every night (yeah, sure). 

Tomorrow night I'm going to add some epsom salt. I have circulation problems with my legs and my right leg is the worst. It's really been causing me pain lately, because I haven't been doing anything that I need to do to alleviate the pain.

I know everything that works, but it's just a matter of making the time. Simple leg exercises, cool baths, elevating my legs and applying aloe vera gel all help. I took a lukewarm bath and then towards the end of my time in the bathtub I ran cold water into the tub. 

I didn't let the water get too cold, but cold enough to soothe my legs and promote circulation, the colder the better though for circulation. When I got out I gently applied aloe vera gel all over my legs. Now I need to make the time to elevate my legs at least once a day and do my leg exercises and I'll be good-to-go. 

Horsechestnut oil works great too for leg pain. I need to invest in some of that. I just want this leg pain to go away... I've been documenting my progress with my leg pain at my Beauty Problem Solvers site for a while now. Feel free to check it out.  And, hey, that pic's cute that I chose for this blog post all except for the phone. Leave the phone out of the bath unless you want it to be your last bath.

Wednesday, June 27, 2012

Father's Day Is For Single Moms Too :)

Written on Sunday, June 19, 2011 at 11:11am on Facebook. Taken from my Facebook Notes.  (11:11 again)

My kids may not have a Daddy "in the house," but they have a kick ass Mom who is both Mom and Dad. A Mom that puts her kids first before her needs - before anything. A Mom that has banged her fingers with a hammer, covered herself in paint, lifts heavy furniture (you know the guy things), teaches her boys to be men - yes, ladies can do it too.  ;)

A mom that takes her boys fishing, was the one sitting at all their baseball games when they played Little League, was the one that went to all their band concerts, stays in touch with their schools, has had "the talk" with them about girls, teaches them to respect girls and always talks to them about their futures.

A Mom that is sometimes the "mean mom," but sometimes I have to be mean raising four boys alone - gotta keep them in line. And a Mom who does and would do anything in the world for her kids.

Carmen's Random Tips: How to Keep Your House Cool in the Summer with or without Air Conditioning

How to Keep Your House Cool without Air Conditioning

Keep your house cool this summer with these simple tips...

photo credit: Hortolano via photopin cc
Okay. So today is the last day of this nasty heat wave, but it's still only July and we could have another one these things, or two... or three... for all we know. 

So I just felt like helping out others by sharing what I did today to keep my home cool and it really helped. Some of you may already do these things or maybe not.

These tips will help whether you have an air conditioner or just a bunch of fans. I'm telling you that it really works and helps

My AC's were literally struggling to keep up yesterday and the rooms that only had a fan were like a sauna, but today they're much better. Please Read.

Simple Tips to Keep Your House Cool when it's Hot Out


Tip #1)  This is for people with fans. First of all, you're going to think I'm crazy, but before the heat wave even begins -- when you know we're getting one -- on that last night of normal cool air, put a fan in the window to draw in cool air. This is where I'm going to sound crazy, but remember, it really works. It's a fact.

My mother taught me this and she learned about it in the news or something a long time ago. I've done this in the past too, but don't always bother with it. I'm glad I did the last two days, though. So here's the crazy part... In the morning, take the fan out of the window and close the window.

Keeping that fan in the window on a day when it's in the 90's is only going to draw in more hot air. Even if you take the fan out and keep the window open - same thing. You're only letting in more hot air. So close the window and follow the next tips below to learn more...

Tip #2)  If you have blinds, then keep them closed and turn them in the upwards direction. Not facing downwards. If you have shades, close them. This keeps the suns rays out.

Tip #3)  If you have solar curtains - great! If not, then try this... And it might sound a little ghetto, but remember that it's only during the "heat wave" and when that's over, you just take them down again. Cover the windows with blankets, towels, heavy dark curtains or several of all of the above to seal out the sun. Sealing out the sun is this is the key on days when it's in the upper 90's or hotter!!

Even in the rooms that are air conditioned, I put up a heavy towel over the blinds and it made such a difference today. Those rooms are much cooler than yesterday. The rooms that only have fans, I completely sealed off any sunlight from getting in.

If I put a towel at the top, then I put a small blanket across the bottom and I didn't stop there... I also  tacked them, that way I made doubly sure that it was sealed. You only need like 2-4 tacks to do that.  And...wow...the rooms that only have fans aren't that bad!! Yesterday, it was a sauna!

Tip #4)  Common sense - make sure to drink water but be careful not to drink "too much water." Believe it or not, you can actually drink too much water. They say 6-8 glasses a day is safe. If you know differently, then feel free to comment.

Tip #5)  Try not to use your stove for long periods. If you know a heat wave is coming, plan on making quick and easy meals. Try avoiding the stove. The stove is not your friend on a day when it's in the upper 90's.

Update to Tip #1)   Two of my air conditioners kicked the bucket last summer and I have every intention of buying new ones this summer, but haven't had the money yet. Hopefully, this Friday I can start buying a few. Anyhow, this is what I did for the recent heat wave that we had here in New York.

I kept my fans in the windows until about 11 a.m. - 12 p.m. on one day, and then shut them until about 7 p.m. - 8 p.m. while the heat was the most intense. The next day, I decided to keep them open all day with the fans, but still kept the top part of the windows dark and covered. It was more comfortable that way compared to day one of the heat wave. 

Well, that's about it!! I really hope that I've helped someone in some way. Try it - it really works!

PLEASE NOTE:  If you have temps in the 100's, then I don't know if I'd recommend any of this.  We survived a recent heat wave here in NY where it was in the upper 90's with the heat index close to 110.  But right now as I speak, I am planning on cooling my entire house with AC's.  

I lost two AC's last summer and am in the process of replacing them.  For that kind of heat, don't take any chances with your health.  If you don't have AC, then stay with a relative or friend.  Also, look into public cooling facilities in your area.  Definitely invest in AC for 100 degree + days.

Tuesday, June 26, 2012

Carmen's Random Tips: Easy Ways to Clean Your Couch

Quick Tips on How to Clean Your Couch Yourself

photo credit: Sauerlaender via photopin cc

Normally when cleaning my couch, I've just always used my vacuum cleaner along with a can of spray Resolve. Or maybe I'll use a squirt of Dawn dish soap mixed with warm water for spot treatments, which is another good trick. 

But recently I learned some new ideas - a few new tricks I'd like to share, which is how I'm going to do it today. If you have children or pets, you will love how easy this is...


Simple and Easy Tips to Clean a Couch without a Professional:


Step 1.)  Vacuum the furniture.

Step 2.)  Wipe down the furniture with antibacterial Wipes. (I bought the Lysol wipes.)

Step 3.)  Spray the furniture down with a can of Resolve. (I love this stuff; it's great on carpets too!) Alternatively, you can use a mixture of 1/4 cup detergent with a gallon of water, instead of Resolve. I just think the resolve is quicker and easier. Quick and easy is what we're aiming for here.

Step 4.)  Take a washcloth or any type of cloth and a bucket of warm to hot water. Dip the cloth into the bucket, squeeze it out good and then begin wiping the furniture down.

Step 5.)  Let the couch air dry.

Step 6.)  Vacuum the couch again.

Step 7.)  Finish by spraying a spritz of Febreze for fabric and voila - clean furniture!

Final Thoughts


Using antibacterial wipes is my new tip. I thought that it was such an awesome idea. So I'm cleaning my furniture today, because in the past few months I considered getting all new furniture, but this set is only four years old  and it cost me a fortune. I was in love with it when I bought it, so I want to take care of it and preserve it for as long as I can.

One of the cushions broke when I was pregnant with my twin daughters (HAHAHA) so this broken cushion made me hate the whole couch. But it would be much cheaper to clean 'er up and fix the cushion than to buy a whole new set. Anywho, happy cleaning!!

Adventures in Peanut Butter and Jelly

I asked  my 2-year-old daughter today, "is it necessary to always wear the peanut butter?" As if she were going to answer me! I really can't wait until they out grow this. It takes me literally a half an hour to an hour to clean them and their highchairs three times a day.

We're almost ready to move on from the highchair. I can't wait and I think they're ready. We just need a bigger table and chair set first before I do this. We need something that will seat eight-to-nine people. Right now the table that we have seats six. We're a seven member family, so that won't work anymore for us.

I have other things on the agenda ahead of the larger table and chair set, so that will have to wait. It's just very frustrating. Sometimes funny - sometimes frustrating. The worst messes are from peanut butter or anything with sauce. They are the youngest of the brood and the last, so I honestly can't wait to not have to clean another highchair again in my life.

Although I'm sure there will come a time where I miss these days. I hang on to them because they're the youngest and yet at the same time I long for the ages of four and five, LOL. So before we even got started with lunch Gabby had a surprise for Mommy. Her latest joy is sticking her finger in her poo when she goes poo.

Apparently she pooed before I put her in her highchair.  I had no clue because I didn't smell it or feel it in her pants when I lifted her into the highchair. So I gave them some pretzel sticks to munch on while I made their sandwiches. I turn around and see something brown smeared on Gabby's highchair!

I knew right away what it was. I ran for the baby wipes and started wiping the tray and her hands. Then I cleaned the tray with antibacterial dish soap and took her to the bedroom to change her very quickly with the door open and her sister in eye sight. Their bedroom door is literally within eye sight of my kitchen.

I then take her back to the kitchen and wash her hands with antibacterial soap and put her back into the highchair, so she could proceed to cover herself in peanut butter and jelly. I worked on some dishes while they ate, which is our routine. I knew they were done when they tossed their plates on the floor.

Then it was time to clean up. I wash one girl and highchair at a time. That is the quickest and less stressful way to handle messes. These two have really aged me - feeling old today.

Monday, June 25, 2012

It's Raining Tuna 6/13/2012

RIP Spooky...😌
Well my daughters had tuna for lunch today... This is the second day in a row and for some reason they thoroughly enjoy trying to feed the cats their tuna. I hear, "here you go," then the "plopping" sound of the tuna hitting the floor. 

Sometimes when they're done eating I find food in the strangest places. Like yesterday, I found a piece of tuna at the top of a cabinet behind my daughters highchair. I'm trying to break them of this delightful little habit that they have. 

I think the cats are learning quicker than my girls with this, because I always send them away if they try to eat the raining tuna and I clean it right away. Today when I was on the floor cleaning up tuna in between their highchairs I heard Isabella say, "hair." 

I instinctively knew that she was going for my head and I said, "don't you dare touch Mommy's hair with tuna fish hands." I had to separate their highchairs too, because it was two against one. They were sharing tuna to toss on the floor, making more work for Mommy. :p

Carmen's Adventures in Parenting: Adventures in Breakfast 5/28/12

Today's adventure began at breakfast time. I was attempting to supervise my 2-year-old daughters with their first bowls of cereal. I could picture milk everywhere, so I wasn't budging from the front of their highchairs. 

And I was also trying to teach my soon to be 16-year-old how to make dip eggs and eggs in a hole (dip egg in bread with hole cut out in the center) at the same time - not such a good idea to do both at same time.

By the time we were done the pan was smoking from butter and I thought I smelled rubber (the handle of the frying pan?) and my brain was a scrambled mess lacking any thought process what-so-ever. During this time my 12-year-old's little league coach called. I couldn't answer due to the pandemonium, so I let him leave a message.

It's Memorial Day, so I wasn't sure what he was calling about. Checked voice mail and just as expected, I couldn't hear him above my daughter Gabby who was screaming shrill because she did not want her froot loops. Mean while, her sister surprised me and devoured hers, which shouldn't have surprised me because it was sugar.

Gabby is a future health nut like her Mama. No, wait...they will both be future health nuts like their mama. Now, back to the coach. I quickly called him back and listened eagerly to what he had to say. Trying to make out his words above all the noise was like decoding morse code.

It turned out that my 12-year-old son has a game tonight and he just wanted to know if my boy would be there. He won't be there because he's on a camping trip with a friend. He'll be back tonight. In the end, milk wasn't spilled and my son's eggs didn't turn out too bad.

As I write this, I am the keeper of the baby gates, sitting on the floor in front of the now "double gates" (plastic and wood) that my daughters still manage to take down. Gabby doesn't do this on her own. Oh, no, this is all Isabella's idea who is so much like her crafty mother that it's scary.

Gabby is going back and forth from the front of the fan that's in the window with mismatched sandals, enjoying the breeze from the fan while Isabella is running back and forth from me to the love seat. Every time she returns to me she jabbers away with something important to say.

Now she's sitting on my ring binder and the other one is trying to rip my paper. I'm surrounded by baby zillas, help...

~It's a beautiful life.

Who cut my grass? 5/24/2012

It was about 3pm when I found someone cutting my grass! I don't know who he is or why he cut it, but I'll take it as a blessing. I told my landlord recently last week that I couldn't afford to pay anyone right now and that I was waiting for the money to buy a lawn mower. Maybe they sent this guy? All I know is that the grass was embarrassingly high, so I am very happy!!

Update:  It is still a mystery as to who this man was that cut my lawn. Not only did he cut it, but it was a hot day and he had a lawn mower in the back of his truck, but cut my grass with a grass trimmer. Sweat dripping off of him and all - yes, he cut it with a grass trimmer! Still remains a mystery...

Adventures In Sweet N Sour Chicken 5/31/2012

Homemade Sweet N Sour Chicken - yum!
Decided to try a recipe that I've been wanting to make for a long time now. It was kind of a difficult recipe to try when you have toddler twins, but I was game. Here's my adventure in sweet n sour chicken...

- Sliced my finger nail while cutting up chicken in between defrosting two packs of chicken. Sliced it good too. Yup, it was bleeding and there was some pain.

- Was almost dyslexic with the food coloring that I needed to use for the orange color. Twelve yellow plus four red equals orange. Well after doing 12 yellow I suddenly remembered that I'm sometimes dyslexic and reverse things. So I doubled checked and low and behold, all is well.

- Open the rice and rice spills onto the floor, but only a little. Toddler is content with measuring cups (the one that takes down baby gates) but she's growing increasingly bored with them.

- I realize that the recipe calls for ONE egg and I don't have ANY! I am never without eggs! So I quickly Google up a substitute for an egg - got it. Drop the cap to the yellow food coloring on the floor in between the cabinet and the wall. It lands way in the back, so I had to really reach for it - got it.

- Toddler throws measuring cup passed me onto the counter and begins making her highchair hop across the room (with all four breaks on by the way). I realize I forgot to time the rice, son of a bleep. Almost slice finger again cutting chicken (same finger). I'm thinking maybe I'll end up in the ER if I keep it up.

- Toddler is no longer hopping in highchair and is happy again with the same measuring cup that she threw at me. Close windows due to screaming of unhappy toddler. Grease starts popping, so I push girls farther back away from the stove than they already are (this is far). I'm choking on flour and cornstarch - have no idea why. Tingle in my throat - trying not to cough on food.

- Two girls now arguing over a piece from my refrigerator because Gabby hopped over there with her highchair and grabbed it and now Izz wants it too.

- Finish dinner and finally sit down to eat. Everyone is happy and all agree that this is some of the best sweet n sour chicken that we've ever had!!

Carmen's Adventures in Parenting: Random Thoughts and Snidbits of My Day 5/29/2012

My Inside Voice for the Day - My Thoughts...


- No fan in bathroom while giving the girls a bath today. They were cooled off and splashed happily while the sweat poured into my eyeballs. When I was done and ready to lift them out I stood up and slipped because my feet were so sweaty in my plastic clogs. Yes, I had on clogs. I really thought I was going down...

- Cleaned peanut butter off of the highchairs today in places that you can't even begin to imagine...

- Carmen Say: Hot coffee in hot house = not such a good idea.

- Note to self:  Pointing fan at desk with papers on it = not such a good idea.

- It was so hot today that Speck (cat) looked dead. Alex poked him to make him move. He was fine - just hot.

- Dinner time we were all joking and laughing loudly when one twin did the "talk to the hand" gesture to her twin sister with her hand and said, "stop" because her sister was being loud, lol.

- Got slapped in the face by a string on my pants when I whipped the pants to fold them. Don't ask...

- I tell my girls to be careful with their pizza and then I go and swallow a sharp piece of pizza crust... Only me...

- Almost had an argument with my mother over the size of Mariah Carey after she started to tell me about Jessica Simpson joining Jenny Craig to lose her baby weight. I mentioned that Mariah is with Jenny Craig too and how people say she's fat when she's not.

And my mother says to me that Mariah's just big boned and always has been. I said she has not and she is not. She says, "goodbye, Carmen" and hangs up on me. She then proceeds to take the phone off the hook. I guess my mother must have missed the first 15+ years of Mariah's career, because Mariah was tiny!🙃

- Was getting my girls ready for bed and while I was dressing one twin, the other twin says, "Maaa." I look up at her and say, "What?" When just as I look up I see her standing on the headboard of her toddler bed holding onto the pink canopy bars (that I will now remove tomorrow - one more thing to remove from their room) and smiling at me...

Random Thoughts and Snidbits of My Days (May 2012)


This is a compilation of random Carmen and Mommy thoughts throughout the month of May, before I got busy with other things and had to take my mind off of blogging. Now I'd like to try and post random thoughts and snidbits of my days every day if I am able to find the time.


- If you get knocked down get back up and fight harder.

- Apparently my daughters aren't ready for canopies on their beds.

- Fixed closet with a lot of sweat.

- Closet broke AGAIN!

- Started drinking green tea again.

- That hamburger grease came way too close to my eyeball!!!

- That moment when your toddler puts peanut butter hands in her hair while eating lunch after you just gave her a bath...

- Is the ponytail holder and bobby pin monster also the sock monster?

- I need a dishwasher - feeling chained to the kitchen sink...

- Another Nick Jr song stuck in my head!

- Rinsed ice cream container and had water shoot me in the eyeball. How did I manage to do this?

- Had to throw out a bag of potatoes because the potatoes were growing limbs. Thought I only had them for one week, but I could be wrong...

- Some things that I remember from when I was a kid:

  • When I would ask my mom where we were going she would always say, "Tim Buck Two." I thought that this was a real place...
  • When people said that a woman was on her rag - I thought that she really was.
- Did you ever go through your friend list on Facebook looking for someone and then you say to yourself, "who the hell was I just looking for?" And then you see their picture and you say, "oh, yeah, them! There they are!"

- Got a drop of dish soap in my first cup of tea for the day after only having two sips - wanted to cry. Had to make a new cup and it was perfect.

- I could hear them cutting the grass across the street again. Seems like they cut it once or twice a week. I wanted to ask them if they'd like to come cut mine too!!

- The conversations that my daughters have together = priceless.

- Note to self:  Find a non-toxic way to repel spiders from back porch. Those two spiders above back door are dangerously close to my face when I open the door!

- Thank you Green Tea - lost four pounds.

- The sound of my daughters' little sing song voices - priceless.

- The cats butt was on my notes!

- Carmen Say:  Hot coffee in hot house on hot day = not such a good idea.

- You know you're getting old when you make sure you don't drink anything before you leave the house...

- That moment when you just completely wiped down one high chair and twin, so you rinse the cloth you're using and start cleaning the other twin. You rinse the cloth full of peanut butter again and return to finish cleaning the second twin when you realize that you're cleaning the twin that was cleaned first... Duh!

- When you're on the phone with someone and you're listening intently to what they're saying when suddenly you space out... You tune back in and have no clue what they were saying or are talking about...  :p


Monday, June 18, 2012

Carmen's Favorite Recipes: Carmen and Mom's Macaroni Salad Recipe

Minus extra ingredients like tomato, celery, etc.

Super Yummy Macaroni Salad


The basic foundation to this macaroni salad recipe began with my mothers ingredients, and then I began adding to them over the years. When I was a teenager all of my friends and my brother's friends loved our mom's mac salad. 

She was always mac for my brother's friends in particular. And I've taken what she taught me and did my own thing with it too. Super yummy...


 Macaroni Salad Recipe


Prep Time:  Maybe 15 - 20 minutes total. It depends on what you put into the salad and the order in which you cook or chop things.

Cook Time:  10 minutes

Servings:  Well, you are cooking one box of macaroni. It depends on how much your family eats. I have a family of 7 and there is usually enough left over for a bowl or two.

Ingredients:

  • One 8 ounce box of macaroni elbows
  • one large can of tuna or 2 small cans - depends on how much tuna that you like - you can also use just 1 1/2 cans
  • 8 - 10 hard boiled eggs
  • small can of sliced black olives (unless you don't like olives)
  • shredded carrots (optional)
  • a tiny bit of green onion for color and flavor (again optional)
  • celery (optional)
  • diced tomato (optional)
  • 1 cup of Hellmann's mayonnaise
  • 1 tbsp of Hellmann's Dijonnaise
  • 1 tbsp of ranch dressing
  • 1 tbsp of Italian dressing
  • 1 tbsp of pickle juice
  • a sprinkle of celery salt
  • paprika (you sprinkle this on top when you're finished, you don't need a lot)

Macaroni Salad Directions:

1.)  Cook macaroni elbows according to directions on box. While the macaroni is cooking, cook your hard boiled eggs. I bring my eggs to a boil and cook them for 10 minutes. After 10 minutes, I turn off the heat and keep them covered in the hot water for another 10 minutes, which is a trick that my mother taught me. Then I drain the water and soak them in cold water twice.

2.)  While these things are cooking, you can use that time to begin chopping up whatever it is that you would like to add to your salad and organizing your ingredients, except for anything refrigerated, of course.

3.)  When the macaroni is done, drain the elbows in a strainer, and then run cold water over them in the strainer. Make sure to wet all of the macaroni with the cold water, then drain again. Dump macaroni into a large bowl. Cover with a paper towel and place in the refrigerator if you're still waiting for the hard boiled eggs to finish cooling.

4.)  Once the eggs are done, slice them up however you like. I usually slice mine and then quarter them.  Depends on my mood. Place the eggs into the bowl of macaroni as you are slicing and chopping.

5.)  Add all of your ingredients except for the mayo, dijonnaise, dressings, pickle juice, celery salt and paprika. Basically, you're adding anything you chopped or diced, plus your can of black olives.

6.)  Add the rest of the ingredients, except for the paprika. The Mayonnaise, Dijonnaise, Ranch Dressing, Pickle Juice and Italian Dressing. Mix well. Lightly sprinkle the celery salt. You don't want to use too much, because it won't taste good. Add a little bit at a time, and then take a sample taste to see if it has enough or if it needs more. I don't measure; I just sprinkle.

7.)  Sprinkle paprika on top and voila! Done! You can serve this with barbecued chicken, hot dogs, burgers, or whatever your little heart desires.


When I made this recently, it was minus some extra ingredients, like the paprika. It still tasted yummy, though!

Saturday, June 16, 2012

Carmen's Random Tips: How To Clean A Kitchen Sponge - Cleaning Tips

How to Clean a Kitchen Sponge Instead of Throwing it Out

photo credit: spryngtree via photopin cc

A Quick Tip to Keep Your Kitchen Sponge Clean and Bacteria Free

Tired of throwing out stinky kitchen sponges? They do in fact sell sponges that seem to last longer and resist bacteria, but there is a way to slightly extend the shelf life of your kitchen sponge that's very easy. 

Kitchen sponges can very quickly become infested with germs and bacteria, but you don't have to throw them away. I mean, unless of course the sponge is raggedy and ready for the garbage, then please do throw it away.

But regardless of how old your kitchen sponge is, you should always try to keep it clean. Especially after washing anything that has to do with raw chicken or hamburger juices.

Two Simple Methods to Clean Your Kitchen Sponge 


The next time you think your sponge needs a quick cleaning to get rid of bacteria, try this:

Method 1)  Simply bring a small pan of water to a boil. Once the water begins to boil, you're going to place the sponge in the boiling water for three minutes. 

Method 2)  My mother also suggests wetting the sponge, squeezing it out, and then placing it into the microwave for one minute on high heat to kill bacteria.

Final Thoughts


I always do this after I've washed anything in connection with meat or chicken. Think about it - do you want to wash your child's sippy cup with the same sponge that you just cleaned chicken or hamburger blood off of a plate with, or a spatula that you just flipped burgers with??

This is a very simple way to keep your sponge clean and bacteria free, while also slightly extending the life of the sponge. Instead of throwing it out and buying new, before you really have to!

Carmen's Random Tips: How do you wash stuffed animals without ruining them?

How to Wash Stuffed Animals without Ruining Them

photo credit: scazon via photopin cc

Learn How to Clean Stuffed Animals with These Easy Tips

Do you have a bunch of dusty stuffed animals that you don't want to get rid of because they're special? You want to clean them, but don't want to ruin them in the washer?

Everyone knows that stuffed animals are a bunch of dust collectors, yet many of us buy them for ourselves or our kids, because they're cute and cuddly or to keep as collectibles. 

Many of these stuffed animals become special due to childhood memories or they become special because someone special gave them to you. 

Because of how special many of these furry friends are it's important to know how to clean them properly to avoid damaging them or ruining them permanently.

When learning how to wash stuffed animals without ruining them you actually have a couple of options here... You can wash the stuffed animals in the washing machine by placing them into a pillow case, tying the pillow case shut, then throwing them in the washer or you can simply wipe them down.

Machine Washing Stuffed Animals Vs. Hand Washing Stuffed Animals


The method that you choose to wash your stuffed animals will depend upon your personal preference. But this should help you to compare the two and grab a tip or two to avoid ruining your favorite teddy.

Machine Washing:  Okay, let's start with the washer... If you put your stuffed animals into the washer, even if they're inside of a pillow case, there is still a chance that they will not be the same afterwards. Meaning that there could still be some damage done to your cherished teddy. If you're really afraid of ruining your stuffed animals - this is a bit time consuming but you can wipe them down.

Wiping Them Down:  You have a few options when it comes to wiping them down. If there is noticeable lint or pet hair, then you should take a lint brush to them first. Remove any and all pet hair, or lint with the lint brush. Then once you've done that you can begin wiping them down with either baby wipes or warm water and detergent or dish soap. 

To clean your stuffed animals with this method you're going to first grab a bucket of soapy water. The soap that you use can be anything from a mild and gentle baby detergent, tide or again, dun, dun, dun, Dawn dish soap.

Final Thoughts and Tips


Regardless of which method you choose to use just make sure to not make the water too soapy; only use a little bit of detergent or dish soap. Next you're going to wipe them down. If you choose to use a bucket of soapy water make sure not to soak the stuffed animals.

And of course wring out the cloth good before cleaning Teddy. Once you're finished wiping the stuffed animals down now it's time to rinse. To rinse your stuffed animals begin by rinsing the bucket thoroughly and then refill with clean water. You're also going to use a fresh clean rag to wipe down teddy again one last time.

When you're rinsing Teddy make sure to remove all soap, but don't saturate your stuffed animal; we're just surface cleaning. Allow teddy to air dry and you're done. When using baby wipes for anything like this I always recommend Huggies wipes. When you're finished your teddy should almost be as good as new!! 

Carmen's Random Tips: How To Wash A Baseball Cap

How to Wash a Baseball Hat without Ruining It

Everything You Need to Know About Washing Your Favorite Baseball Hat

photo credit: jspad via photopin cc
Washing a baseball hat can be a bit tricky. You wanna be really careful with it, especially if the hat is a favorite hat, because if you just throw the hat in the laundry it's a goner. The brim of the hat will never be the same again... 

And there's nothing worse than a hat with a bad brim. Well, a dirty hat is worse, but that's why you're here. So how do you get a hat to come clean then? Well, there's a few ways, actually. You have options...I have four for you to choose from.


Four Easy Methods to Wash a Baseball Cap


Wash your favorite baseball cap with one of these four easy methods: 

A Cap Shaper:  You can clean your favorite baseball hat by first purchasing a Cap Shaper. Next, you're going to place your hat into the Cap Shaper and throw it into the laundry, or you can wash your baseball cap with the cap shaper by placing it into the dishwasher.

If you have a dishwasher, that is... I know that not everyone owns a dishwasher. I don't have a dishwasher, or a Cap Shaper, so we use manual labor to wash our hats. I think it's time to invest in a Cap Shaper, though!

Dawn Dish Soap:  To manually wash a baseball cap, again, you can use good old dawn dish soap! To wash your hat with dawn dish soap, simply wet a cloth and rub some dawn dish soap into the cloth. Then you're going to wipe the areas of your hat that you would like to clean.

Rinse the cloth with clean warm water and wipe again to remove any soapy residue. Finally, pat the hat dry and let it air dry.  

Huggies Baby Wipes:  You can also wipe your hat down with a few Huggies baby wipes. This is very simple and works well, but can be time consuming if you have a lot of hats. Simple take one baby wipe, or double them up and wipe the areas of the hat that you want to clean.

Cap Cleaners:  Try purchasing a good cap cleaner to clean your hat with. To clean your hat with a cap cleaner, simply spray the cleaner onto your hats before washing them, along with your Cap Shaper too, of course. They also sell cap cleaners that you spray onto your favorite hat and then brush the hat with a cap brush, instead of washing the hat in a washing machine or a dishwasher.

Final Thoughts


That's about it. Those are the only options that I know of to wash a baseball cap. I hope these tips come in handy for you when washing your favorite baseball hat and have been helpful! If you know of any other tips on how to clean a baseball hat, feel free to share and leave a comment below!!

Carmen's Random Tips: Cleaning With Baby Wipes - Cleaning Tips

Baby Wipes Can Clean Just About Anything

Easy, Breezy Cleaning with Baby Wipes

photo credit: share your widsom via photopin cc
First of all I love baby wipes for so many things. Baby wipes are not antibacterial, but they're great for wiping down anything dusty with, or better yet wiping down a highchair pad. I discovered this when I ruined one of my daughters high chair pads in the washer.

After that I started using baby wipes to wipe it down after they would eat. Cleaning with baby wipes is amazingly easy. All you have to do is take a baby wipe or you can take two and use two-at-a-time and then wipe, or scrub the high chair pad. That's it.

This removes everything, even anything that appears to be a stain. It comes right out with a baby wipe and your high chair pad will look like new. Some of the many things that I've used baby wipes to wipe things down with include wiping down high chair pads, wiping down my flat iron, dusting, wiping my kitchen table, etc.

You would be amazed by the stains that a baby wipe can remove. They work great for spills on the floor too. Instead of getting out the mop, try this... First wipe up the spill area with paper towels, then swipe it with a couple of baby wipes and voila...clean!

This is much easier than getting out a bucket and mop for a simple spill!! (This is for spot cleaning of course) I should add that I only use Huggies baby wipes. I've said this in other posts too regarding baby wipes that I'm not sure how well other wipes would work for cleaning with.

For more tips on cleaning your flat iron check out my S.O.S pad cleaning tips!

Carmen's Random Tips: How to Clean Crevices - Cleaning Tips


photo credit: champagne.chic via photopin cc

Clean Crevices in Three Easy Steps

What is a crevice? 

Crevices are those little areas on your stove, cabinets, in your car, tile, or even high chairs, that when you wipe the area to clean it, you just can't seem to get those areas to come clean thanks to built up gunk.

This gunk could be dust, food, or anything disgusting like that. A crevice could also be considered as the edge or corner of an item.


How to Clean a Crevice Thoroughly with These Three Easy Steps 


Step 1)  To clean crevices, the first thing you're going to do is wet a paper towel or cloth with warm/hot water. The warmer, the better.

Step 2)  Next, you're going to carefully wrap this wet paper towel or cloth around a pointy object, such as a knife, a toothpick, or even your finger nail.

Step 3)  Carefully scrape into the area that you're trying to get to come clean. The gunk will come right out.  If using a knife to remove built up gunk, then press very carefully as to not scrape and ruin wood or ceramic.

And that's it. This is particularly helpful if you have baby furniture that you like to keep clean because of your little one(s). Keep your cabinets, baby furniture, areas within your car, and other household items gunk free with these three easy steps to clean crevices.

Carmen's Random Tips: How to Clean Spilled Pancake Mix - Pancake Mix Warning

An Easy Way to Clean up Crusted Pancake Mix

photo credit: 427 via photopin cc
If you've ever spilled pancake mix, then you know what a pain in the behind it is to clean up if you don't wipe it up right away. If you wipe it up instantly though, it's a breeze. 

But if you let it sit, it becomes crusted and embedded in your stove and counter tops, damn near impossible to remove. First and foremost to avoid this, if you spill pancake mix make sure you wipe it up right away. 

It's so much easier to wipe up when it's still wet than when it's crusty and dry!

Clean Crusted Pancake Mix by Doing This:

  1. To clean dry, crusted pancake mix from your stove first wet the dried pancake mix spot and let it sit for a little while. How long you let it sit will depend on how bad the spot is and how old it is.
  2. Once the spot has softened up a bit, wipe and voila, gone. You might have to scrape at it a little with an S.O.S pad if it doesn't remove completely. But that should do the trick.
Your best bet is to avoid the pancake mix drying, though, by cleaning it up right away. Clean it up as soon as it spills to avoid aggravation later! I learned this lesson the hard way.

Carmen's Random Tips: The Many Uses Of SOS Pads - Cleaning Tips

SOS Pads are Awesome - Cleaning Made Easy

photo credit: arbyreed via photopin cc
I first started using these things in my late 20's and wish I had tried them sooner, because these things are awesome

They make cleaning greasy things like frying pans and stoves so easy. You can even use them to clean flat irons. 

Yes, flat irons! These are just a couple of the many things that you can use an S.O.S. pad to clean.

Use S.O.S. pads for cleaning jobs that include: 


Stoves and Counter Tops:  Before discovering S.O.S pads cleaning my stove was a nightmare and time consuming. I could clean my stove with soft scrub and a sponge with a scrubby, but it never seemed to come as clean as I'd like. Soft Scrub is all I use for my bath tub, but doesn't seem to do the trick on the stove.   

Wiping the stove down with kitchen cleaners is good for small jobs, but when your stove is a mess from anything greasy you really need an S.O.S pad. They make cleaning much easier and much quicker! You can clean your entire stove with these things - even the knobs! 

Stove Burners:  To clean the burners stick them in the sink with warm soapy water for a little while, then clean them with an S.O.S and voila...clean! 

Microwave:  Cleaning your microwave is a breeze with S.O.S. pads.

Counter Tops:  If you have a stubborn spot on your counter tops that won't come clean whip out an S.O.S. pad and it'll be gone in seconds. For instance recently I had paper stuck to one of my counter tops. Nothing I tried would get it to come off. I decided to take an S.O.S pad to it and it came right off!

The Kitchen Sink:  When it's time to clean the kitchen sink if you have built up grime from soaking dishes take out an S.O.S. pad and it'll come right off.

Flat Irons:  A while back I was having trouble getting my flat iron to come clean. Baby wipes work good if there's not a lot of product build up, but if you have a lot of product build up take an S.O.S pad to it and it'll come clean just like new.

To clean your flat iron with an S.O.S. pad first you want to make sure that the flat iron is turned off and unplugged. Then you're going to wet the S.O.S pad making sure to squeeze it out good so that it's not dripping into the crevices of your flat iron. We don't want that.

Then carefully wipe down the flat iron, again, making sure to not get liquid into the crevices. Wet a paper towel or cloth, squeeze it out good and wipe off the residue from the S.O.S. Dry the flat iron with a dry paper towel, or cloth, and voila...like NEW!

My Final Thoughts


I would like to add that my flat iron is a tourmaline, so I am not sure how this would work with ceramic flat irons...just a friendly warning. I've had my flat iron for two years now. It had a two year warranty and I never had to use it. My flat iron straightens my hair just as good as the day I bought it thanks to S.O.S pads!

Carmen's Random Tips: The Best Way to Get Rid of Stains from Clothes - Laundry Tips

Quick Laundry Tips to Get Rid of Stains From Clothes

photo credit: GloriaGarcía via photopin cc

How to Get Rid of Stains

Learning the best ways to get rid of stains from clothes is a cinch with these quick laundry tips that I'm about to share. I've only tried two methods of removing stains that have worked for me over the years...

One of these methods is with a little bit of Dawn dish soap, which requires a little work but works great none-the-less! And my all-time favorite way to remove stains from clothes - Oxiclean!

The Best Ways to Get Rid of Stains


Dawn Dish Soap:  To remove a stain with Dawn dish soap first wet the item that you want to remove the stain from. Next, apply a little bit of the dish soap to the stain. Rub the dish soap into the stain with your fingers and then let it sit for a while. Place the item into a sink or tub, wet it and work on the stain with a toothbrush or by just rubbing the item together - sort of like hand washing. Throw the item in with a load of wash and your stain should be removed!

Oxiclean:  To remove a stain with Oxiclean is a bit simpler... You can soak the item in a bathtub with hot water and Oxiclean, or you can just throw it in the wash with hot water and Oxiclean. But remember that you should always use hot water with Oxiclean. The hot water is what makes the Oxiclean dissolve and works better to remove stains. To save on my gas bills, I usually start out a load of wash with hot water and Oxi, along with my detergent of course.

And then I lower the water temperature to warm about a quarter of the way through the washer filling up with water. If it's a new stain it should come out on the first try. If it's an old stain you might have to do this a few times, but it should eventually come clean. If you soak it in a bathtub or basin with Oxiclean you can let it sit and soak over night if you like. The more time that the item soaks in the Oxiclean the better your chances are of getting the stain out!

Final Thoughts


You can also remove many stains with baby wipes! I forgot to add that little tip. For new stains only try wiping the stain with a baby wipe before also throwing the item into the wash with some Oxiclean. I only use Huggies baby wipes for things like this. I'm not sure how well other wipes would work though.

Quick and Easy Dinner Ideas: Homemade Oven Barbecue Chicken

An Easy Homemade Barbecue Chicken Recipe That You'll Love

(See below for pictures.)  


This homemade barbecue chicken recipe is one of my favorites and it's become so easy for me to make now compared to the first time I made it.

The amount of ingredients may seem overwhelming, but it's really not. You can also tweak the ingredients, adding more or less of what you like based on your own personal preferences.

You can make it hotter or sweeter! The first time that I made this recipe was for my 7 year old son's 2nd birthday party and everyone loved it, especially my special aunt who is no longer with me. It was sooo good and to this day is one of my favorites to make!

Warning: Addictive Oven Barbecue Chicken Recipe 

Prep Time:  15 minutes

Cook Time:  1 hour

Servings:  Depends on how much chicken you make.  I have made 6 boneless chicken breasts with this recipe and other times I have made about 5-6 drumsticks and 5-6 thighs in one batch.  You can also use any type of wing.  Fill the pan if you want.  You will have a lot of sauce.

Ingredients:

  • Chicken (whatever you like - breasts, drumsticks, thighs, wings or a little of everything)
  • 1/4 cup of butter
  • 1 tbsp of onion powder
  • 1 tbsp of garlic powder
  • 1 tbsp of chili powder
  • 1/2 cup of brown sugar
  • 3 tbsp of worcestershire sauce
  • 1 1/2 cup of ketchup
  • 3/4 cup of water
  • 3 tbsp of prepared mustard
  • 1-3tbsp of hot sauce (optional)

Note:  If you use hot sauce, spice it up to your liking. You can tweak any of the ingredients for this oven barbecued chicken recipe; just don't leave any ingredients out. It won't taste the same. I know, I did this a couple of times...

Homemade Barbecue Chicken Directions:


1.  Preheat oven to 350 degrees.

2.  In a large saucepan, melt the butter. Add onion powder, garlic powder, chili powder, worcestershire sauce and mustard. Mix well. Add ketchup and water to saucepan mixture and mix well again. Simmer for 10-15 minutes.

3.  Place chicken in a 9x13 inch baking pan or dish. Pour sauce mixture over chicken. Bake uncovered for 45 minutes to 1 hour.

Serve with whatever you like!! I serve this with mashed potatoes and a veggie.  Best barbecue chicken I've ever had!


Finished Simmering
Before Baking
After Baking

Enjoy!

Carmen's Favorite Recipes: My Father's Gandule Rice Recipe (Pork or Chicken with gandule rice)

My Very Special Gandule Rice Recipe

How to Make Gandule Rice


(See below for pictures.)


This is a very special recipe to me. This gandule rice recipe was passed on to my mother from my father, who was born and raised in Puerto Rico. 

My mother later taught me how to make this rice, as my father is not in my life. It was always one of my favorites growing up. 

My mother added the pepperoni to the recipe; that is her own personal touch. She always called this recipe "Red Rice," so growing up that's what I always called it, too.

Red Rice Recipe

Prep Time:  All total, maybe half an hour tops. It's hard to say, because some of the prepping you do while other things are cooking.

Cook time:  15 min-20 min for the chicken or pork.

                   20 min - 25 min for the rice with the chicken or pork.

Serves:  4-6

Ingredients:

  • 8 ounce pepperoni stick, sliced and quartered
  • vegetable oil or olive oil  (the amount of oil that you use to cook the pork, will depend on you.  1-2 tbsp. of oil to sautee the peppers, garlic and onion.)
  • 8 pieces of boneless pork, sliced into strips (you can do this before you cook the pork or after)
  • 1 large onion
  • 2 green peppers
  • 4 cloves of garlic, minced
  • 2 Goya Sazon packets
  • 2 cups of medium grained white rice
  • 1 15 oz. can of Goya Gandules
  • 1 8 oz. can of Goya tomato sauce 
  • Goya Adobo (to taste 1-2 tsp.)
(You can also make this recipe with chicken instead of pork. I sometimes use chicken drumsticks or boneless chicken tenderloin strips.)

Gandule Rice Directions:

1. Using 2 frying pans, place 4 pieces of boneless pork into each frying pan. Use as much vegetable oil as you like. I don't cover the pork in vegetable oil; about half way. Cook the pork for about 5-10 minutes each side. Use one packet of goya for each pan, covering all of the pork in Sazon. Also sprinkle a little Goya Adobo on the pork. Season to taste with the Adobo.

2.  While the pork is cooking, start dicing your onion and peppers and mincing your garlic.

3.  When the pork is done, put the pork onto paper towels, on a plate. Cover them with another paper towel and stick them in the refrigerator while you work on the rest of the meal.

4.  Put the onions and peppers into a Dutch oven or rice pot. Sautee them in about 1-2 tbsp. of vegetable oil. Sautee until soft.

5.  While the onions and peppers are sauteing, start cutting up the pepperoni. Slice the pepperoni into slices, then quarter each slice. (see pictures) Keep checking on the peppers and onion while working on the pepperoni. If need be, turn off the heat on the peppers and onion while you finish cutting the pepperoni.

6.  Pour the tomato sauce into the pot with the peppers, garlic and onion, adding the pepperoni and stir. Cook on very low heat for a couple of minutes, not long. Then turn off the heat.

7.  Take out the pork from the refrigerator and cut each peace into strips.

8.  Add 3 cups of water (you don't need 4 because the 8 oz. can of tomato sauce counts as one cup of liquid.), 2 goya sazon packets and bring to a boil on high heat. Sprinkle Goya Adobo, again to your liking.  I think two good sprinkles are good.

9.  Add 2 cups of rice, the pork strips and a can of goya gandules. Stir briefly and then bring to a boil.

10.  Once the water starts to boil, reduce the heat to low. I have a gas stove and turn the heat to number 4 on my stove. Cook on low heat for 20-25 minutes.

11.  While the rice is cooking, you can prepare a salad to serve with the rice or make a separate veggie of your choice. I also serve this with bread and butter.


Note:  When I use drumsticks, I usually boil the drumsticks in water and goya packets for about a half an hour or so and then cook it into the rice. With chicken tenderloin strips, I cook it in the same manner that I cook the boneless pork.

Another Note:  I have a family of 7; to feed my family, I increase the rice to 3 cups, the water to 5 cups and the goya sazon packets to 3.

P.S.  The Red Rice name is a name my mother gave this rice, because it looks sort of reddish. Growing up that's what I thought it was really called. You can call it gandule rice, chicken and rice, pork and rice. You can call it whatever you like. You can also make the rice without the chicken or pork in it and use it as a side dish.  :D  


Pork cooking
 
onion soaking in water - prevents tears ;)

chopped onion

chopped onion and pepper

what you need

Goya tomato sauce and gondules

simmering before adding water


after adding water


bring to a boil and cover, turning the heat to low heat

slicing the pork into strips

the rice I use, sometimes I use a different brand


after - so yummy!!


Best Come Back Ever Coming Soon

 To be continued...